Quick Summary
How to Judge A Luxury Stone Slab from Photos and Videos
A luxury stone slab should not be chosen from one attractive close-up photo. A close-up can show color and surface texture, but it cannot show the whole vein structure, the balance of the slab, the darker areas near the edges, or whether the strongest movement will land in the right place after cutting. For MQ STONE projects, photo and video review should help the design team move from visual interest to a real material decision.
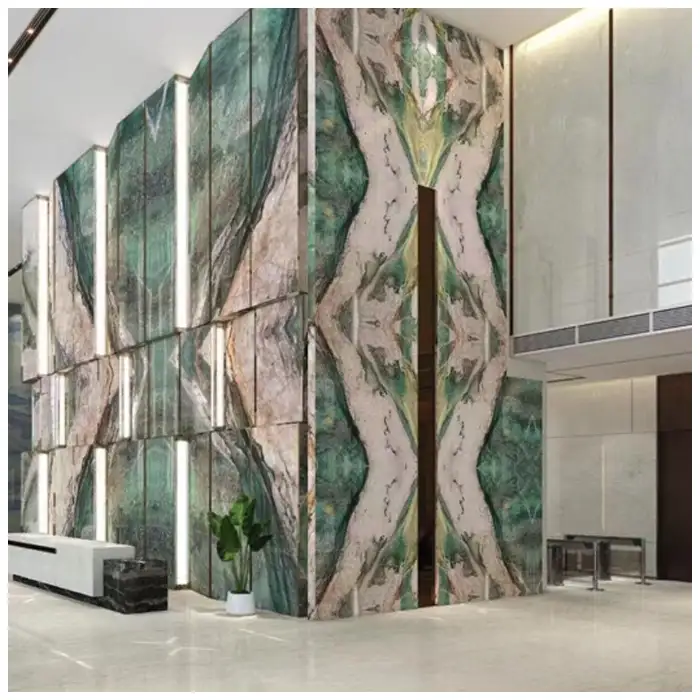
This matters most for expressive materials. A quiet beige marble, a blue marble with strong movement, a green marble with branching veins, a dramatic quartzite, or a mixed-color slab from the luxury stone category can change completely once it is cut for an island, wall, table, vanity, or reception counter. The question is not only whether the slab is beautiful. The question is whether the slab works for the intended surface.
This guide is written for interior designers, architects, villa owners, hotel design teams, high-end residential renovation teams, and stone fabricators who need to review current material gallery options before choosing a slab. It explains what to ask for, what to look at, and how to connect photo review with layout, finish, fabrication, and project use.
Why one close-up photo is not enough
One close-up photo can make almost any stone look stronger than it is. The camera may focus on the best corner of the slab. The lighting may hide cloudy areas, resin lines, pits, fill, or shade changes. A crop may remove the edges, where color or vein direction often changes. The image may also make a small section look more consistent than the full slab.
For natural stone, the full piece matters. A slab selected for a table top may need a centered composition. A slab selected for a wall may need a strong vertical movement or a balanced bookmatch. A slab selected for a kitchen island may need a clear relationship between the sink, seating side, waterfall edge, and vein direction. A small photo cannot answer those questions.
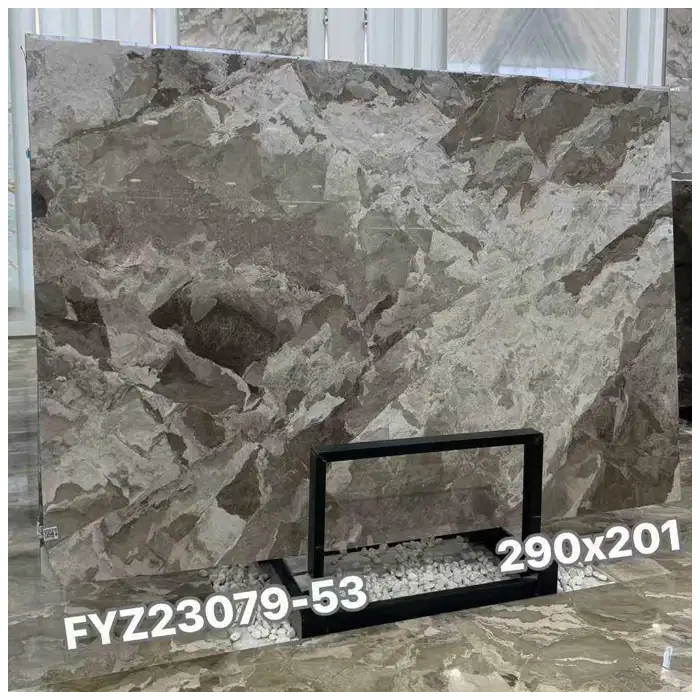
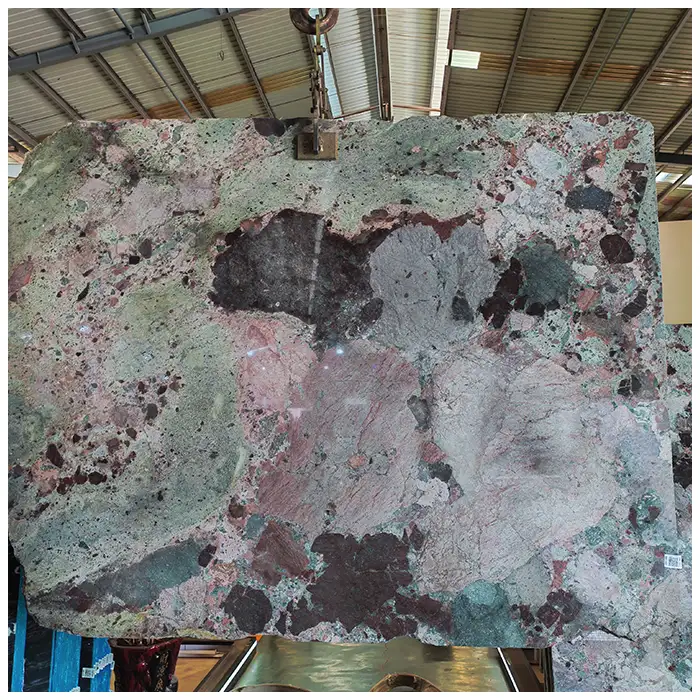
Start with a straight full-slab image. The slab should be photographed from enough distance to show all four edges. If possible, ask for the slab beside a scale reference, such as a tape measure, slab label, or visible rack spacing. Then ask for close-ups of the main vein, the background area, the edge, and any area that may affect cutting.
A short video adds information that still photos cannot show. Moving the camera across the slab can reveal gloss, finish, texture, small color shifts, surface fill, and light reflection. This is especially useful for polished marble, quartzite, and dark or highly reflective stones.
First check the full-slab composition
The full-slab view shows whether the material has one strong center, several diagonal veins, a cloudy field, a quiet background, or a broken pattern. This is the first design decision. A slab with strong movement may be excellent for a feature wall but difficult for a small vanity. A calm slab may be better for a table top or countertop where the surface should not fight the furniture or cabinets.

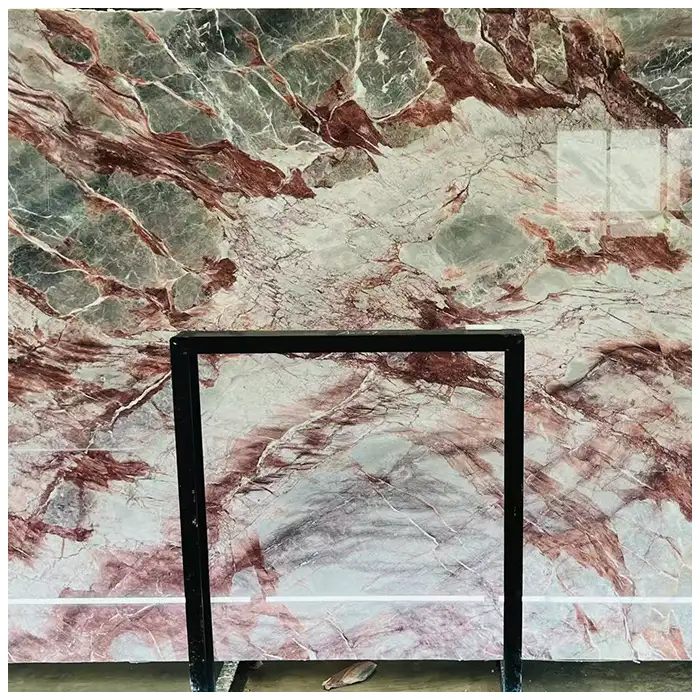
Look at the direction of the movement. Does the vein run vertically, diagonally, horizontally, or in several directions? A diagonal vein can make a wall feel dynamic, but it may be awkward if the project needs formal symmetry. A horizontal movement can work well on long counters or table tops. A vertical movement can suit cladding and tall feature panels.
Also look at negative space. In stone review, the quiet areas matter as much as the dramatic veins. A wall panel may need a calmer area for a mirror, logo, artwork, or light fixture. A kitchen island may need a clean section around the sink or cooktop. A table top may need the pattern centered so the furniture does not feel visually unbalanced.
If the slab is being considered for stone table tops, check how the pattern will look after the table is cut to size. The strongest part of the slab may not be in the center of the finished top. If the table is round, oval, or irregular, the layout needs even more attention.
Then check color, tone, and lighting
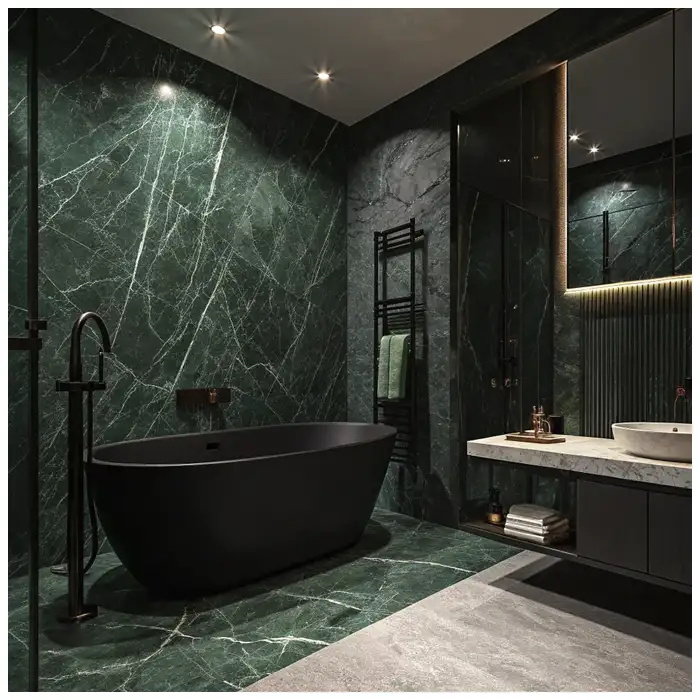
Stone color changes under light. A slab that looks warm beige under warehouse light may look cooler in daylight. A blue marble may become deeper under warm interior lighting. A green marble may shift toward gray or black depending on the finish. This is why photo review should include more than one lighting condition when possible.
Ask whether the photo was taken under natural light, warehouse lighting, or showroom lighting. If the project has a strict palette, request an additional video under neutral light. A white balance card is useful, but even a simple video with a consistent camera movement can help reveal whether the color is stable across the slab.
Compare the slab with the intended surrounding materials. Dark stones often need a different lighting plan from white marble. Beige and brown marble may need warm metal finishes or wood tones to feel connected. Blue and green stones can look sharp beside white walls but may need calmer cabinets or furniture to avoid visual competition.
MQ STONE’s color categories, including blue marble, green marble, brown marble, and white marble, should be reviewed by actual available slabs, not only by category images.
Use video to inspect finish and surface detail
Finish changes the way a slab reads. Polished stone reflects light and makes veining sharper. Honed stone feels softer and reduces glare. Brushed, leathered, or textured surfaces can make the material feel more tactile, but they may also change cleaning and color depth. A still photo may not show these differences accurately.
Ask for a slow video moving across the slab at a slight angle. This can reveal reflection, texture, pits, filled areas, resin, hairline movement, and the way the stone reacts to light. It can also show whether a dark stone has a mirror-like polish or a softer surface.
For countertops and tables, ask for a close-up of the finish near the edge of the slab. For walls, ask for a wider video that shows the slab as a vertical surface if possible. For bookmatched panels, ask for the two slabs placed together or shown in sequence so the movement can be evaluated as a pair.
Some surface features are normal in natural stone. Variation, small fissures, fill, and tonal movement do not automatically mean the slab is unsuitable. The important question is whether those features fit the application, the finish, and the designer’s expectation. A feature that feels interesting on a wall may feel distracting on a table top.
Check bookmatch and vein-match potential
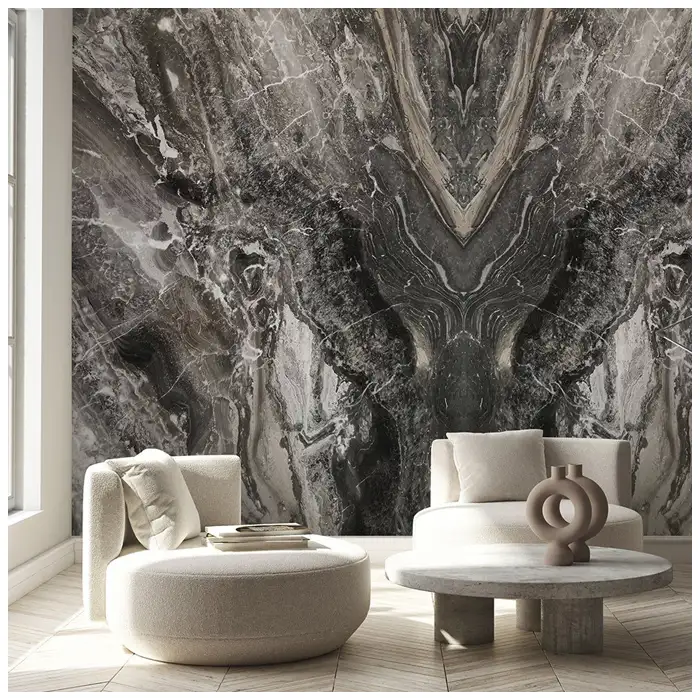
Bookmatching is one of the main reasons designers ask for sequential slab photos. In a bookmatched layout, two slabs are opened like pages so their patterns mirror each other. The result can work well for feature walls, reception backdrops, fireplace walls, bathroom vanity walls, and large cladding areas.
Bookmatching should be intentional. It is not enough to say that two slabs are similar. Ask whether the slabs are sequential, whether they can be opened as a pair, and whether the intended wall size fits the usable bookmatch area. Also check whether outlets, shelves, mirrors, signs, or taps will interrupt the main pattern.
Vein matching is different. It may not create a mirror image, but it tries to continue the stone movement across seams. This is useful for long counters, large islands, wall panels, and waterfall ends. A good vein match can make the cut pieces feel connected even when the layout is not symmetrical.
For stone cladding, ask for a marked layout showing which slab becomes each panel. This is especially important when the wall is large or when the design uses a strong material such as Patagonia-style quartzite, dramatic marble, or mixed-color luxury stone.
Match the slab to the application
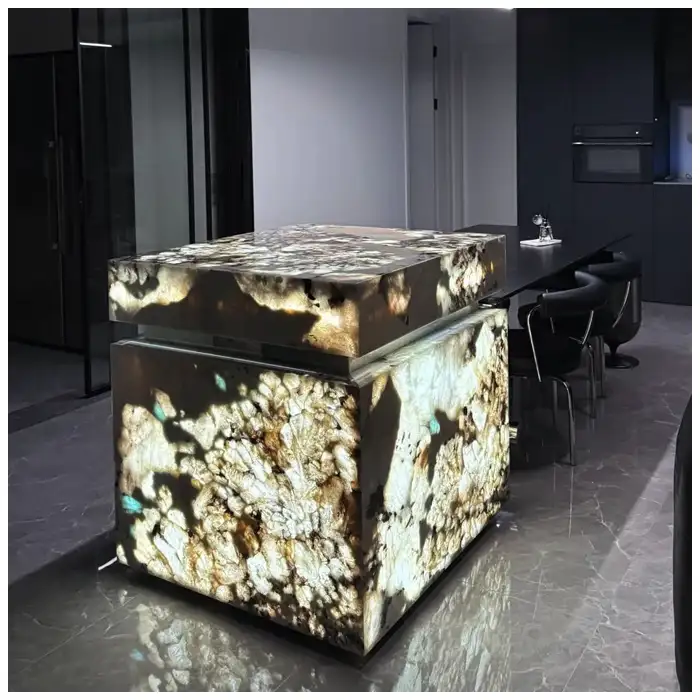
The same slab can be excellent for one application and poor for another. A strong patterned marble may look impressive as a lobby wall but too busy as a narrow stair tread. A dramatic quartzite may be ideal for a kitchen island but difficult to repeat across several bathroom vanities. A dark stone may work for a table top but need careful lighting on a wall.
For kitchen countertops, check slab size, seam position, sink cutout, cooktop cutout, edge profile, and how the vein will run across the cabinet layout. For walls, check panel size, bookmatch, attachment needs, seam location, and lighting. For tables, check center composition, edge detail, thickness, and whether the top will be round, rectangular, oval, or custom shaped.
For hotel and villa projects, check whether the slab is a one-off feature or part of a repeated design. A one-off reception wall can use a very dramatic stone. Repeated bathrooms or corridors may need more consistent slabs or a material with better lot control. For repeated rooms, natural variation must be managed carefully.
The best photo review ends with a layout decision. It should not stop at “the slab looks good.” It should answer where the slab will be used, how it will be cut, what surfaces will be visible, and which details need confirmation before the stone is reserved.
Comparison: what each visual check tells you
| Review item | What it shows | Why it matters |
|---|---|---|
| Full-slab photo | Overall movement, color zones, edge condition, usable area | Helps decide whether the slab fits a wall, table, island, counter, or feature panel. |
| Close-up photo | Texture, crystals, fill, small fissures, vein detail, finish | Helps judge the surface quality and whether natural features are acceptable for the application. |
| Moving video | Reflection, gloss, color shift, texture, surface consistency | Shows details that still photos may hide, especially on polished or dark slabs. |
| Sequential slab photos | Bookmatch or vein-match potential | Important for feature walls, cladding, fireplace panels, and large visual surfaces. |
| Marked layout photo | Where cuts, seams, and focal areas will land | Connects the stone choice to fabrication and reduces layout surprises. |
This table should be used as a practical checklist. It does not replace physical sample review or fabrication drawings, but it makes remote slab selection more disciplined. For expensive or highly visual stones, the marked layout photo is often the most useful document after the full-slab photo.
Watch for common approval mistakes
The first mistake is approving a slab from a close-up only. A close-up can hide too much. The second mistake is approving a slab without checking the intended cut. A strong vein may be removed by a sink opening, hidden by a table base, or interrupted by a wall outlet. The third mistake is ignoring lighting. Some stones look completely different under warm, cool, and side lighting.
Another mistake is assuming that a stone name guarantees the same appearance. Materials sold under familiar names can vary widely. A quartzite, marble, or luxury stone category should be treated as a starting point. The current slab photo, lot, finish, and project use are more important than the name alone.
Do not assume that every dramatic slab should be bookmatched. Bookmatching works when the slab pair, wall size, focal point, and cutouts support it. If the wall is broken by doors, mirrors, or cabinets, a simple vein-matched layout may look better. In some rooms, a quieter slab is more refined than a forced symmetrical pattern.
Also avoid approving the stone before the surrounding materials are known. Cabinet color, wall paint, metal finish, lighting, flooring, and furniture all change how the slab reads. MQ STONE can help compare marble, quartzite, sintered stone, and other statement slabs against the intended application.
How to request a useful slab photo and video package
A clear request produces better material review. Instead of asking only for “more photos,” ask for a specific package. The goal is to see the slab from full view to detail, then connect it with the intended surface.
- Full front photo of each slab, showing all edges and the slab label if available.
- Short moving video across the full slab under stable lighting.
- Close-up photos of the main vein, quiet background area, edge, and any filled or unusual area.
- Sequential slab photos if bookmatch or vein-match planning is being considered.
- Thickness and finish confirmation for each slab.
- Marked layout suggestion for wall panels, island tops, table tops, or countertop runs.
- Photos beside a neutral reference or color sample when tone is critical.
- Packaging, handling, and fabrication notes when the slab is intended for an export or project order.
This package helps architects and designers make a more reliable decision. It also helps the supplier avoid vague approval. A photo package should not promise that natural stone has no variation. It should make the variation visible before the decision is made.
Connect photo review with project drawings
The best slab review connects photos with drawings. A stone can look excellent in the rack but fail in the layout. Before reserving the material, prepare the wall elevation, counter drawing, table top dimensions, or cladding panel schedule. Even a simple annotated drawing can prevent a poor cut.
For countertops, mark the sink, cooktop, seam, edge profile, backsplash, overhang, and cabinet length. For feature walls, mark the finished wall size, visible centerline, outlets, lighting, signs, mirror, shelves, and any open joints. For table tops, mark the finished shape, base position, edge type, and whether the pattern should be centered.
If the project is still early, use approximate drawings and update them before fabrication. Early review helps decide whether the slab is worth holding. Final review should happen before cutting, with exact dimensions and confirmed layout.
MQ STONE’s project page can help a design team think about application rather than isolated slabs. A beautiful stone should be judged by how it will appear in the finished room, not only by how it looks in a warehouse photo.
Related material guides from MQ STONE
Frequently asked questions
1. What photos should I request before choosing a luxury stone slab?
Request a full-slab photo, close-up photos, a slow moving video, sequential slab photos if bookmatching is needed, and a marked layout image when the slab will be cut for a wall, island, table, or countertop. A close-up alone is not enough for serious slab approval.
2. How can a video help when reviewing marble or quartzite slabs?
A video can show gloss, reflection, finish, texture, color shift, filled areas, and surface movement that still photos may hide. It is especially useful for polished marble, quartzite, dark stone, blue marble, green marble, and slabs intended for visible feature walls or table tops.
3. Should a dramatic slab always be used as a bookmatched wall?
No. Bookmatching works when the slab pair, wall size, centerline, and cutouts support the layout. If mirrors, doors, outlets, or shelves interrupt the main movement, a simple vein-matched layout or single-slab feature may look cleaner than a forced bookmatch.
4. How do I know if a slab is suitable for a countertop or table top?
Check the full slab, finished size, seam plan, edge profile, cutouts, thickness, finish, and the position of the main veins. A slab that looks good on a wall may be too active for a small counter. A table top also needs centered composition and edge planning.
5. Can slab photos replace physical samples?
Photos and videos are useful for early selection, remote review, and layout planning, but physical samples still help confirm texture, finish, and tone when the project requires close control. For natural stone, final approval should connect photos, samples, drawings, and current slab availability.
Final Conclusion
Judging a luxury stone slab from photos and videos is a practical design step, not a shortcut. The full-slab photo shows the overall movement. Close-ups show texture and surface details. Video reveals reflection, finish, and color shift. Sequential photos and marked layouts show whether the slab can become a wall, island, table, countertop, or bookmatched feature.
For MQ STONE projects, the best result comes from matching the slab to the application before it is reserved or cut. Review the current marble, quartzite, luxury stone, and material gallery options with the project drawing, not just with a cropped image. MQ STONE can provide current slab photos, videos, bookmatch options, size information, finish details, and application-based recommendations for interiors that need a clear statement surface.
Ask MQ STONE for current slab photos and videos
For a feature wall, countertop, kitchen island, table top, reception area, bathroom wall, or hotel interior, share the project application, size range, preferred color, finish, and layout idea. MQ STONE can help review current slab photos, videos, bookmatch options, and material alternatives before the selection moves into fabrication.
References
- Dimension Stone Design Manual 2024, Natural Stone Institute Technical Committee, Natural Stone Institute, Natural Stone Institute.
- Standards and Specifications for Natural Stone Products, Natural Stone Institute Technical Committee, Natural Stone Institute, Natural Stone Institute.
- Bookmatching: Geology Meets Geometry, Use Natural Stone Editorial Team, Natural Stone Institute, Use Natural Stone.
- ASTM C119 Standard Terminology Relating to Dimension Stone, ASTM Committee C18, ASTM International, ASTM International.
- ASTM C1528/C1528M Standard Guide for Selection of Dimension Stone, ASTM Committee C18, ASTM International, ASTM International.
- ASTM C503/C503M Standard Specification for Marble Dimension Stone, ASTM Committee C18, ASTM International, ASTM International.
- ASTM C616/C616M Standard Specification for Quartz-Based Dimension Stone, ASTM Committee C18, ASTM International, ASTM International.
- Natural Stone Slab Handling and Safety Resources, Natural Stone Institute Safety Committee, Natural Stone Institute, Natural Stone Institute.