Arabescato Corchia Floor Layout: Vein Direction, Tile Scale, and Doorway Transitions
Before a single tile is fixed, one question decides the rest: where does an Arabescato Corchia floor layout change the finished result rather than only the drawing? A floor takes the movement of the marble and asks it to survive doorways, furniture shadows, joint lines, and the long view from one room into the next. I would rather settle the starting line and the laying order in the first review, while a slab allocation or a cut list can still change at low cost. A recorded layout decision travels better than a grid someone remembers from a site visit.
Set the starting datum before the room axis
Every Arabescato Corchia floor layout begins with a decision about where the set-out is measured from. The natural candidate is the main sight line or the room axis, but the true control point is often a fixed element that cannot move: a threshold, a wall that will carry cabinetry, or the centre of a large opening. I like to name that datum first, then let the joints fall from it, because a line that begins in the right place can absorb small variations at the edges.
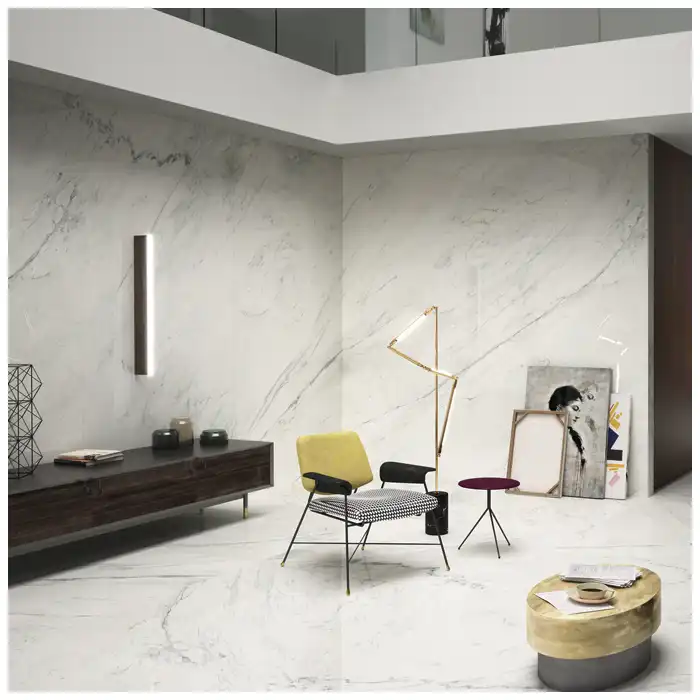
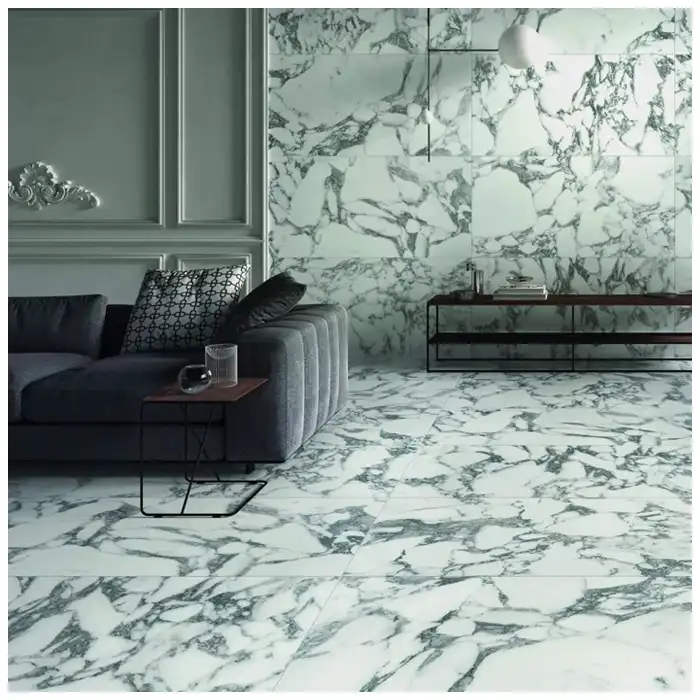
The room axis and the vein direction are not always the same thing. Arabescato Corchia often reads well when the movement runs with the longer dimension, but a strong vein can also be used to lead the eye toward a window or a doorway. On site I compare the two, using the slab photos beside the plan, and decide whether the joints follow the veins or deliberately cross them.
Off-axis rooms, angled walls, and columns complicate the set-out. Where a space is not square, a single rectangular grid can leave a widening sliver of cut pieces along one wall. I would rather split the layout into fields, each with its own reference, than force one grid to fight the geometry all the way across the floor.
The datum belongs in the record. Once the starting line is fixed, it should appear on the layout drawing with the direction of the veins and the position of the first course. A later trade can then check a single reference instead of guessing which wall the installer used on the day.
I also check the datum against the way the room is entered. The first line a visitor meets is usually the one at the doorway, so a layout that starts from an interior wall and finishes with a narrow cut at the entrance rarely reads well. Beginning the set-out from the entrance side keeps the most visible course intact.
I keep the datum visible during the whole job. A line marked on the floor and repeated on the drawing gives the setter and the designer the same starting point, and it makes any drift obvious early rather than at the far wall. When the reference is clear, a small adjustment at the perimeter stays a detail instead of becoming a re-lay.
Zoning, transitions, and the threshold
Zoning also helps me decide where an Arabescato Corchia floor layout should spend the strongest material. The part of the floor that the eye meets first usually deserves the calmest, most continuous field, while a busy corner or a walkway behind furniture can take a piece with more movement. I set that allocation on the plan before the slabs are nested.
A floor is read in zones even when it is laid as one continuous field. An entry, a walkway, and a fixed furniture area each have their own pattern of traffic and their own way of catching light. Dividing the plan into these zones early tells me where a full tile is worth reserving and where a quieter, more uniform field will do.
The doorway is the most demanding transition on any floor. A moving vein that meets a threshold can either continue into the next room or stop cleanly at the door line, and the choice changes how the two spaces relate. I check the transition from both sides, at standing height, because a line that reads well in plan can look abrupt once the door and the casing are in place.
Furniture and fixed joinery decide where the floor is seldom seen. A run of cabinetry, a heavy sofa, or a bed base will cover large areas for years, so the most active part of the marble does not have to be spent there. Reallocating the calmest pieces under fixed furniture keeps the visible field stronger without changing the material.
Transitions between materials also need a clear line. Where stone meets timber, tile, or a metal trim, the joint should be planned to sit under the door leaf or along a deliberate axis rather than in the middle of a sight line. I agree that line before the cutting list is issued, because it fixes the finished size of the stone at the edge.
| Review point | What to confirm | Record |
|---|---|---|
| Set-out datum | Starting line and room axis | Note on the layout drawing |
| Vein direction | Movement relative to joints | Keep with the slab photos |
| Threshold | Doorway transition at each opening | Mark on the plan |
| Cutting list | Panel sizes and off-cuts | Issue before laying begins |
The Hard-Won Lesson: A strong vein met a doorway and stopped in the wrong place
A floor can carry a convincing vein across an open room and then lose it the moment a threshold interrupts the line. The common version of this problem appears when the door position is settled after the layout is drawn, leaving a bold movement to finish against a casing instead of leading through the opening. The marble is unchanged; the sequence was wrong.
The Lesson: draw the doorways first, set the datum from them, and only then fix the direction of the veins.
Joint rhythm, panel width, and cutting loss
For an Arabescato Corchia floor layout I treat the cut list as a working document, not a final one. It should be able to change when the set-out reveals an unexpected wall, so I keep the essential pieces flagged and the flexible areas loosely assigned. A list that can absorb a small change without a re-order is far more useful on site than a perfect drawing that cannot move.
Joint spacing sets the rhythm of the floor. Wide panels let a single vein run almost uninterrupted and read as a quiet field, while narrower pieces break the same movement into repeating notes. Neither is better on its own; the choice has to suit the room size, the furniture, and how many interruptions the pattern can take before it looks busy.
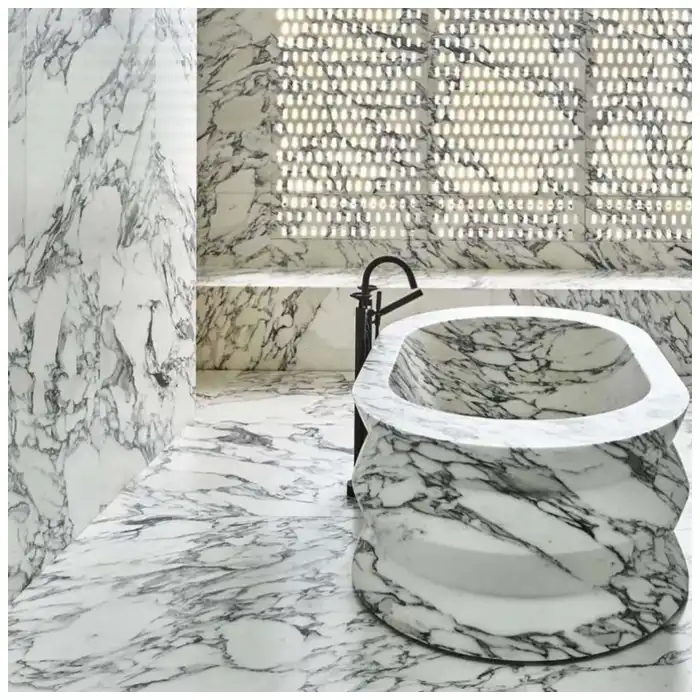
Panel width is also a yield decision. Large tiles show the material to best effect but leave more off-cut, and small tiles waste less at the edges yet demand more joints. A cutting list should show how the slab divides, where the off-cuts go, and which pieces are non-negotiable, so the setter does not quietly sacrifice the important cuts to save a day.
Cutting loss is not simply the material that falls outside the room. It is also the pieces that are cut well but placed where they will be hidden, or the valued part of a slab spent on a corner that could have taken a quieter remnant. Planning the nesting of pieces across each slab is where a layout gains or loses its best surface.
The laying order follows from that plan. I sequence the work so the most visible field is placed from a settled datum, while edge cuts and hidden areas are fitted afterward. That order keeps the reference pieces accurate and stops small site adjustments from drifting into the middle of the room.
Setting out on site, delivery checks, and the subfloor
An Arabescato Corchia floor layout is only proven when it is set out on the actual floor. I ask for the datum, the joint spacing, and the first course to be marked out and photographed before any adhesive is mixed, so the approved plan can be compared with the room while a change is still free. Setting out from a single reference also keeps the joints parallel across the whole area.
I would rather spend an hour at the start than a day at the end. Walking the room with the set-out drawing, the delivered pieces, and the project’s own requirements answers most of the layout questions before the first tile is fixed, and it leaves the crew with a reference they can trust when the designer is not standing beside them.
Delivery is a checking point, not just a drop-off. The pieces should be checked against the cutting list for size, finish, and orientation, and the veins compared with the approved layout while the crates are still on site. A panel that arrived reversed is far easier to catch on the pallet than beneath a finished floor.
The subfloor decides whether the joints can stay true. Flatness, moisture, and any movement in the base all transfer to the finished surface, and an uneven base can make a carefully planned joint line wander. Where the build includes underfloor heating, the laying sequence and the moisture condition of the screed can affect when the stone may be fixed, so those checks belong with the layout plan rather than after it.
I also agree the sequence of trades before laying starts. Where joinery or skirting has to follow the floor, the set-out has to allow for it, and a change to the programme can move the datum if nobody has fixed it. I confirm that order in writing so a late trade does not disturb the reference line.
Those site conditions are conditional, not absolute. Whether a specific floor is ready depends on the actual flatness, moisture, and heating system in that room, so I confirm each one against the project’s own requirements instead of assuming a single rule fits every site. When the checks are recorded, the setter and the client are looking at the same evidence.
Keep a floor map that outlives the build
I review the Arabescato Corchia floor layout map with the people who will live with the floor. When a client can see the numbered plan and the reserved spares, they understand what is fixed and what can still flex, and that shared understanding is worth more than a drawing only the fabricator can read.
A floor is the part of a room that is hardest to change later, so the layout record matters long after handover. I keep the set-out drawing, the slab photos with the vein direction marked, the panel numbering, and the cutting list together, so a future repair or extension can match what is already underfoot.
Spare pieces are part of that record. Reserving a few full tiles or a length of edge from the same slab and batch makes a later repair possible without a colour mismatch, and it is far easier to set them aside at production than to source a match years afterward.
The numbering should follow the plan, not the crates. When each piece carries the room and position shown on the layout, an installer can find the correct tile without guessing, and a client can describe a problem by referencing the same diagram the fabricator used.
I also note the conditions the floor was laid in, such as the set-out datum, the transition details, and the checks that were passed before fixing. Those notes turn a finished floor into a documented one, and they answer most questions that arise once the room is in daily use.
The map is most useful when it is simple. A single plan with numbered pieces, an arrow for the vein direction, and a short list of the agreed transitions will be read far more often than a folder of drawings. The aim is a record that a later trade can follow in a few minutes rather than one that has to be decoded.
Questions We Hear Before Release
1. Where should an Arabescato Corchia floor layout start?
Start from a fixed element that cannot move, such as a threshold or a cabinetry wall, then let the joints fall from that datum so the edges absorb small variations.
2. Should the veins run with the long axis of the room?
Often, but not always. Compare the vein direction with the room axis and with the main view, then decide whether the joints follow the movement or cross it deliberately.
3. How are doorways handled in the layout?
Plan each threshold before cutting. Decide whether the vein continues through the opening or stops cleanly at the door line, and check both sides at standing height.
4. How much cutting loss should be expected?
Loss depends on the room shape and the panel size. A good cutting list shows where the off-cuts go and which pieces are essential, so the best surface is not spent on hidden areas.
5. Does the subfloor or heating affect the joints?
It can. Flatness, moisture, and any movement in the base transfer to the finished floor, so confirm those conditions against the project’s own requirements before laying begins.
Quick-Reference Checklist
- Mark the set-out datum and the first course before laying.
- Compare the vein direction with the room axis on the plan.
- Fix each doorway transition before the cutting list is issued.
- Sequence the most visible field before hidden edge cuts.
- Photograph the set-out and the delivered pieces before fixing.
Final Conclusion
An Arabescato Corchia floor layout is read in sequence, from the threshold inward, and the layout is what keeps that sequence coherent. MQ STONE ties Arabescato Corchia floor layout to the datum, the vein direction, and the cutting order that carry the stone across every opening.
References
- Dimension Stone Design Manual, Natural Stone Institute.
- ASTM C503/C503M, Standard Specification for Marble Dimension Stone, ASTM International.
- Natural Stone Institute Resource Library, Natural Stone Institute.
- Kitchen & Bath Planning Guidelines, National Kitchen & Bath Association.
- Architectural Stone Guidance, Stone Federation Great Britain.
- Мермер, Wikipedia.